Get your own Modular Wargaming and RPG Terrain System at our E-shop!
Showing posts with label board. Show all posts

2017/02/09

Journal #15 - Going Urban!

Welcome to our first major 2017 Blog update, presenting the details of our next project, the Pedion Urban Battlefields!

For those of you already keeping in touch with this page, this is something you must have been expecting, as it was announced in the previous blog post and all over social media. The Urban Battlefields are to be the first major expansion of our Modular Battlefields line, a comprehensive selection of options to stage village/town/city encounters and battles. It includes enough textures, ideas and designs, to go beyond another "unlock" of our existing line, and qualify for a full campaign on Kickstarter of its own.

Ready for some Pedion street fights?


What will the new tiles do?

I will start by stating the design principles behind the Urban Battlefields; the tiles should:

  1. allow the gamer to quickly recreate street networks and the chaotic fabric of an urban environment in multiple configurations, different for each game.
  2. look beautiful and authentic, but at the same time be practical for gaming.
  3. work with other Pedion Battlefields tiles.
  4. enable the placement of buildings, fences and terrain scenic details in general from any manufacturer, without stealing the spotlight. 
  5. adhere to all Pedion design parameters: full molecularity, simple connectivity, thin, low weight, durability, easy storage. 

Have you thought about Buildings, Scale, Textures?

There are several issues that one must take into account when producing the layout of urban tiles, which were not so acute in our open space tiles:

  • Their textures and styles immediately limit the historical/fantastical eras they can be used for (e.g. an asphalt road rules out any non 20th+ century era gaming). 
  • Their width restricts their playability in different miniatures scales. This becomes quite more pronounced when there are road lines, which should be in scale.
  • They look a bit drab without any actual urban features upon them, i.e. they look out of place without buildings, since till that time all you see is an unexplained open space crisscrossed with roads.

Regarding those last 3 issues, I've gone along and made some basic decisions.

Starting from the third one, this expansion will not have anything to do with man made structures. There are many manufacturers of beautiful houses and buildings out there, and I hope they will not mind using their gorgeous products for some photoshoots in order to show off how the tiles would look on your table. Pedion is all about bringing to you stuff that it's not already on the market, and the market has lots of buildings. We have ideas on fully modular constructs, but this will be a specialised, later effort.

On the issue of scale, we will continue with our previous selection of 7cm (2.75 inches) for the roads' width. This particular width has been successfully tested on the Modular Battlefields so far, and it "plays" fine, from 15mm to 28mm scales. For the mathematically oriented, these 7cm represent a 7 meter wide road in 15mm (2 lane road) or a 4 meter wide road (1 lane) in 28mm. And there is nothing stopping you using a 7cm road as a highway in 10mm urban gaming (e.g. Dropzone). Finally, the new tiles could this way be connected with minimum fuss with roads on our current line. Therefore, we will be going with 7cm width for a universal effect, and perhaps unlock wider roads if there is respective demand during the campaign.

Road scale - Does my Tank fit?

My only issue are the road lines and markings on modern, asphalt urban environs. Especially dividing lines, which automatically designate road lanes and therefore vehicle size (and thus, gaming scale). This is something we cannot easily avoid, so it will be up to the backer to decide if he/she wants lines to show on the asphalt and what scale to be implied. Designing the road lines will be an added service, to be done in the way each customer wants it.

Finally, the selected Themes. Trying to encompass the look and feel of every urban corner in every era and genre can be quite impossible. Even more, Pedion is intended for gaming, not for dioramas (however good it may look). So, from all the options, I concluded on three (3) generalised urban terrain Styles, feeling that they could cover multiple periods and that the buildings placed on them would do the job of specialising the board's historical/geographical/genre purpose.

The Rustic Style: Dirt/Cobblestone combination

The first Style available will combine classic cobblestone roads with a "dirt"/soil texture on non-paved areas, i.e. the spaces reserved for buildings. The soil texture is broken with patches of green vegetation, and there are extensive grass tufts on the road sides, where the water usually collects. The dirt coloration is a not one used in our tiles before, but completely new, intended to be more neutral for any geographic location.

The style works quite well on on Urban/suburban environment where the people may have used cobbles to pave some of their streets. It fits Rustic settlements, rural areas, villages, small Towns, even ancient cities if the residing civilization used stone on roads. By leaving open spaces in-between the houses, one can create smaller alleys and dirt paths branching away from the main cobblestone roads. There are no signs of a drainage system, so that the Style can be used in areas and eras where an underground one would not exist.

In the following photos you can see the Style used on a 3'x3' configuration of 9 tiles, with and without buildings and miniatures.

The intended 3'x3' Pedion Urban Set, Rustic Version

The exact same board, now populated with buildings, miniatures, scenery and vehicles,
turned into a European Village during WWII for a game of Bolt Action

Or... how about a fantasy Village, with some Goblin Raiders?

The Medieval Style: Cobblestone combination

Perhaps the more robust Style, as it can be used in many a Wargame or RPG scenario. The style uses two different cobblestone patterns, a smaller, recessed one for the roads, and a larger, embossed one for the building spaces. There is an irregularly shaped string of stones on roadsides to act as a primitive sidewalk, and there are drainage grates implying the existence of basic sewers.

The Style can be used to represent the basis of multiple urban environments, especially medieval areas, fantasy settlements, and many European City Centres up to the present day!

The following snapshots give an example of the Medieval Style, with and without extra stuff on it.

The contents of a 3'x3' Pedion Urban Set, Medieval version

The same board, now with greenery, buildings, fences and entrenched German troops!


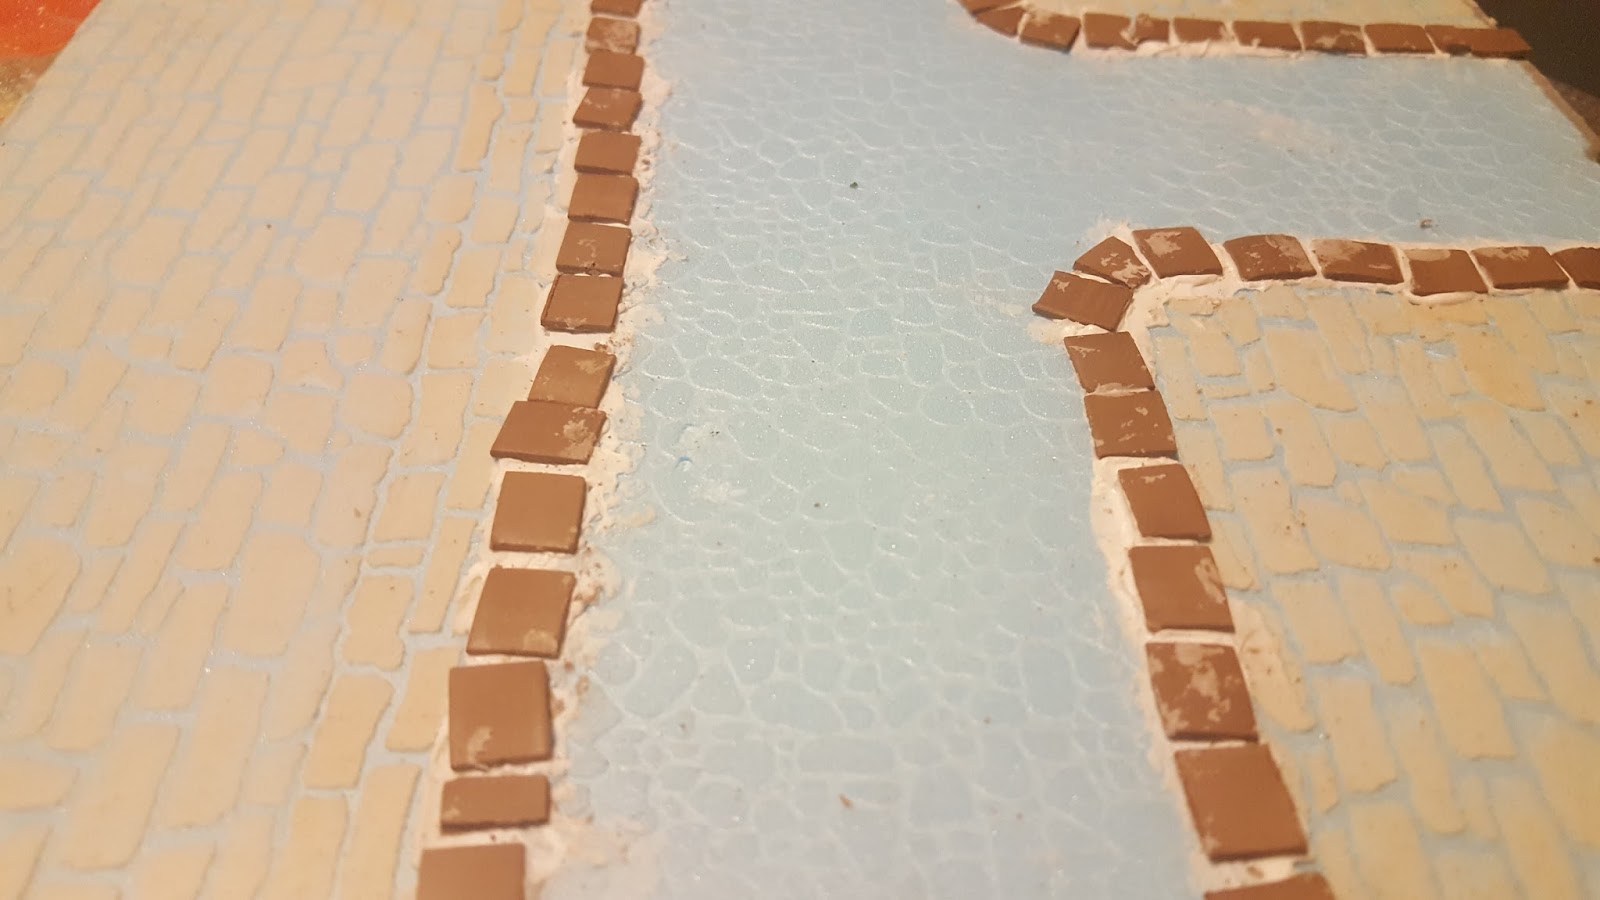
and a view under the hood: how the Medieval styled tiles look before painting:


The Modern Style: Paved stone/Asphalt combination

For those gaming in the modern (or futuristic) era, I've designed a Style where the road surface is asphalt, the open areas are paved with large geometric stones, and there are proper pedestrian sidewalks. There are again drainage facilities, like manhole covers. The sidewalks protrude 1mm from road level and they are 2.5cm (1") wide.
As mentioned above, road lines are possible but may limit the option of playing in different scales. Greater road width will probably be an option during the Kickstarter.


The contents of a 2'x2' Pedion Urban Set, Modern Version

A Street fight on the board above


Why the Kickstarter?

The main reason for a running a KS campaign for this expansion is actually the same as for our previous one: we want to gauge if people like the idea behind those tiles, so that we can iron out all the details and schedule up a full production. By running a KS campaign we will be able to find out toward what designs do gamers lean, and flesh out specific ideas and new designs with our supporters. This will not be a simple "preorder" phase, but a chance to bring people to our drawing board, months before we start actual production.

What about the Kickstarter which is still fulfilled?

The newer campaign will by no means affect or influence the current production and fulfillment of the much more complex previous Modular Battlefields campaign. The new KS will pertain to a production which will start months later, with a different design, and under its own production team and personnel. Even more, the Urban tiles will be designed to be more straightforward production-wise, to act as a separate, streamlined line.


When will the KS Campaign start?

Quite soon! The plan is to have the campaign ready and be able to launch before the end of this month, February 2017. The sooner we start the sooner we will be able to go full throttle after finishing all current fulfillment. There will be one more Blog post to give more details on the Campaign, as well as to discuss various ideas and expansions on the 3 basic Urban Styles. There you will find out more on add-ons, unlocks, stretch goals and how the Urban tiles will work with the current .Pedion Sets. But you can keep in touch and learn about any news if you follow us on our facebook page and/or our twitter account!


Hope you enjoyed reading all about our new stuff! Get ready for the Kickstarter!

George

2015/05/22

Journal #9 - or, Announcing the Kickstarter; Pedion is spreading its wings

This will be a short post, written to mark the end of a phase; and to introduce a tentative start into Pedion's full potential. All the previous blog posts were about the design of a modular terrain, how I would like it to work, and on the prototypes to test my principles. Now, it is time for the next step, as many among you reading these pages have wondered "They are nice - is there any way to get my own?".

So, without further ado, I am proud to announce that I will attempt to crowdfund Pedion with a KickStarter Campaign. The Campaign will start on Wednesday, 27th of May 2015, if everything goes according to schedule. Yes, that's next week, only a few days away. So mark your calendars, as this is a chance to pre-order complete Pedion Battlefield Set at a reduced price.
Do you want to learn about the campaign launch the moment it happens? You can go to thie Prefundia page and enter your email to the field box at the top - you will get an email when we launch, and you will have the chance to get some of those limited Early Bird packages available!
Also, the Prefundia page gives a summary of the Campaign and its Rewards, in case you want to freshen up your Pedion info, or you want to share the project with your gamer buddies who may be interested.


Why the Kickstarter?

Pedion started as a homemade project, but I believe it has the potential to reach gamers worldwide – and that’s what the Kickstarter is for. This campaign is for mass producing and making Pedion Battlefield Sets commercially available.

The modular system has already undergone extensive design and prototyping. However, the tiles are still mostly handmade, although much of the development process is standardized and the bases are machine-cut. By this Kickstarter campaign, I aim to:
a) determine if there is actually a "market" for pre-painted modular, expandable terrain,
b)  to expand Pedion by designing more prototypes, ground covers and magnetic features, and
c) -main reason- acquire an initial sum in order to invest into mass-production solutions, namely molds, resin and matrices.

But crowdfunding is not the only adventure that Pedion will partake in...

Going to UK GAMES EXPO 2015!


This is another big step - we are leaving the comfort zone of Greece to bring Pedion straight to the gamers! This years' UK Games Expo will be held in Birmingham, UK, from the 29th to the 31st of May. And Pedion will have a small stand in Library Suite, number L17, with many prototypes for all of you to see. Check more about the Exhibition and the Trade Hall plans here.

The Exhibition will take place the same period with the Kickstarter. So if you are wondering whether Pedion is really as good as it looks, come by - and perhaps you will even get a small gift as a thank you! However, if you wait until the EXPO to make up your mind, those Early Birds may fly away...

And the Pedion Webstore is Live!

Last but not least, for those of you not interested in 3D terrain but would be fine with game mats, you will be happy to know that our webstore is live. Only a few products are available right away, but they all implement the Pedion principle of modular battlefields.
So if you want to know more about our PrintTiles, the awesome (and affordable) Gaming Mats for Space Battles and RPGs, or the economy and realistic FoamGrass tiles, check the webstore through Facebook or straight at http://pedion.ecwid.com/


As you can see this is a busy time for Pedion - all we ask is that you help us spread those wings.

Good Gaming,
George

2015/02/16

Journal #4 - or, Time to show them Grass Tiles!

I feel that the time has come to -drum roll- stop bombarding you with walls of text and show you some actual Pedion™ tiles! Keep in mind: everything you will see in this and future relative posts are prototypes, what you would call a "Work in Progress" (or WIP). But they come quite close with what I envision the final product will be, so you will get the idea, and see more of my progress.

Adventurers ambushed by Goblins on Plain Grass and Broken Ground Pedion Tiles
(miniatures included for show only, manufactured by Reaper and WotC, painted by me and +Tasos Leontarakis) 
As established in all previous posts, Pedion™ tiles will be 30x30cm squares. My approach towards Modularity is that each Tile will fulfill a Specific Battlefield Role. While Pedion™ can act as a battle mat where players put terrain objects on top, its design is such that each tile will include specific terrain features as its integral part - at least, natural terrain features like rivers, rocks, forests, hills etc.

Therefore, each Pedion™ Tile will have a base Use declaration, and an appropriate design. Expect to see Hill Tiles, Forest Tiles, Road Tiles, River Tiles, Difficult ground Tiles, Orchard Tiles, Plain Tiles, Elevation change Tiles and so on!

With this blog post, I start a series of presentations of the Tile types which will be available for Pedion™. And I will begin by describing two of the most commonly found kinds: what I call Plain Grass Tiles and Broken Ground Tiles. Fear not, it will be more "photo gallery" than "text description" ;)

A Plain Grass & Broken Ground tile layout in 3' x 4' formation
These tiles will consist, as you may imagine, the bulk of any Pedion™ configuration, and will cover most of your table. They are also quite straightforward to produce, so I will be showing them together.

Plain (Grass) Tiles

The so-called plain tile will be the most common type of them all, lacking any complex terrain features. Its purpose is to represent open ground, which usually imposes no penalties or modifiers to unit movement. It can also act as a base for any extra terrain pieces (like buildings) the players already have and want to include in their game.

Plain Tiles will vary depending on the prevailing terrain and weather conditions of the battlefield - they can be snowy plains, sandy deserts, urban concrete flats or exotic grey sci-fi valleys. However, I believe that most gamers, myself included, usually find their armies in grassy plains, and this is the design I started from. The main characteristic all the Plain Tiles will share is their flat surface. Not the most realistic state, but suitable for miniature movement in wargaming!

The Plain Grass Tiles are designed to be quite straightforward to make (ie not much to show you here). After prepping the tiles, a neutral earth basecoat will be applied, and they will be generously flocked with grass. I prefer the Spring Meadow tone of static grass from Noch for its natural looking color. Choosing the flocking type of the plain grass mats is important: this static grass will need to be present in every other kind of tile, especially at the tile borders, in order to achieve an unified look when interconnecting them together.


As an alternative to earn some production time (while it costs more) I decided to cover Plain Grass Tiles with 30 x 30 cm sheets of pre-flocked static grass mat. Again, Spring Meadow grass mats from Noch look and behave great. One of the advantages of gluing pre-cut grass mats (aside from it being much quicker) is the fact that I plan to cut the grass sheets with a few (1-2) mms extra on each side. The extra ribbon of grass can be used to cover the seam between the grass tile and neighboring tiles.


By the way - even premade grass mats shed an enormous amount of static grass! I found out that I could collect bags of the stuff that just fell off. This also meant I should seal the the grass tiles, probably with watered down PVA, to stop it from continuously shedding in your houses...

Broken Ground Tiles

Plain grass tiles put next to each other produce a single, solid green plain area... also known as a "golf course". Each battlefield will need some more variety, and thus I created the Broken Ground tiles.

These Pedion™ tiles can be used in a variety of ways. You can use them just to provide aesthetic variation between plain tiles. But they can offer much more: they can be declared as broken/difficult ground in the battlefield, imposing any special modifiers and penalties your game system associate with this type of ground. Players can decided to declare as difficult ground the whole of the 30x30 tile, or just inside the parts painted with a more earthen appearance.

Broken Ground tiles are again mostly flat -with the exception of some low rock features- to allow unit movement and any additional terrain object placement. They will be flocked/painted to correspond and blend with the rest of the battlefield type. For instance, my prototype Broken terrain tiles where painted to combine with the Plain Grass tiles.

Broken Ground Tiles require more involvement in their preparation, as well as multiple waiting periods for the various paint layers to fully dry. Check these images for a step-by-step presentation:

Texturing
Flocking
Checking layout configurations
Detail: checking ribbon overlay to hide seam
Basecoating
Drybrushing
Low rocky features
More flocking - details, to make tile look realistic
Combining with plain grass tiles
Next to some Road tiles

Hope you like the result. My aim is to create a number of varied "Broken Ground" tiles to recreate an interesting -albeit flat- looking battlefield.

During the above procedure I learned some valuable lessons, sometimes the hard way (unfortunately). Suffice it to say, I can now make broken ground tiles in a more efficient and time-saving way, which does not include multiple flockings, and it certainly does not involve instant coffee powder to resemble gravel (don't ask...).

Plain Grass and Broken Ground Tiles will be a major part in every Pedion™ configuration. I would include about 6 Plain Tiles to every 4' x 4' or 4' x 6' battlefield, and probably the same number of Broken Ground tiles. However, I would like to hear/read your opinions on the matter!

Please do comment, the whole purpose of this blog is to get your feedback and build a better Pedion. Also, share these posts with people who you think could also help. And of course stay tuned, for more tile-showing posts, like my Road Tiles.

Good Gaming All!

2015/02/06

Journal #3 - or, Choosing materials for Pedion Modular Terrain Tiles

Here I am, back to my blog, to ramble on about the materials I will use on Pedion tiles. I know, I know; the last blog post was not too impressive, lots of talk, and no "real" terrain progress showing. But it was an important part of developing Pedion, and I feel I should share it with anyone interested. However, I WILL try to by "less text wall, more to the point" in this third blog post, to make it an easier read.

So, as finalized in my previous (#2) post, I decided to go with Square tiles, each measuring 30x30x1(thickness) cm. The next step was to decide a) which materials to use and b) how to keep the modules connected to each other - both points I will be tackling here.

Choice of Materials

Before describing my process, let me remind  -once more- my Requirements which apply to the Tiles, as presented in post #1: Modularity, Efficient Storage, Lightweight, Economical, Durable, Appearance, Level surfaced, Seamless and Connectivity - all these under the perspective of mass producing Pedion, not just making a home-brewed terrain table.

Most of these Requirement play a major part in selecting construction materials. Efficient Storage is quite covered by the selected tile size and depth. Seamless and Connectivity we will cover further below. All the others are crucial, especially the difficult combination of Lightweight/Durability/Economy! Also, regarding Appearance: I wanted the Pedion tiles to be made from something to allow me to work with and create depressions on the terrain. That meant that a simple, hard basing material was not enough, but a more malleable material (like foam) was needed.

My first effort, as shown in the pictures, was the use of Foam Board, also known as Foam Core, the material most Architects use for modeling (told you I'm an engineer, didn't I?). For those of you who have not heard of it, it's a combination of solid foam sandwiched between two layers of strong cardboard (we call it "maquette paper" in Greece). I used 1 cm thick foamboard (about 0.4 of an inch) and cut it into my 30x30cm (~1x1ft) squares. Foamboard has a variety of great advantages: it is strong, yet extremely lightweight. It can be cut by normal craft tools, like a hobby knife, although it requires a proper method to do so (watch Mel's great video tutorial). And it combines the rigid cardboard with the foam in its core, so I could just "dig" into the stuff and create anything I wanted (up to 1 cm deep), and still have a base underneath. It also allowed me to keep a small (2-3 mm) cardboard "edge" on each tile, so they could overlap and cover the seams a bit. Finally, while not as cheap as pure foam sheets, it is not to expensive either (even at the 1 cm thickness) so I could keep the project cost low.

That's aprox. 1' x 1' x 0.4" for those of you challenged by metric figures :) 


You can see the small edge left when cutting, to allow overlap between tiles
So, why I keep using the past tense? What went wrong with foamboard? Well... it wraps, as many people using it will tell you! To be more precise: it does not always wrap, and you can minimize/avoid warping with proper preparation. You see, what happens is this: when you apply to much liquid on one side, say watered-down PVA glue (as it is bound to happen in terrain making), the water shrinks the cardboard on this side. The shrinked cardboard then pulls the foam core and the other side, and the sides and corners of the tile are raised. How to avoid this effect? you can put duct tape on the under-side, even "paint" it with watered-down PVA as well, to refute the warping effect when the upper-side will start shrinking. However, this is something you can try for a homemade terrain, not as standing method in consistent-quality mass production. Oh, and there were also Durability issues: much use would start to fray the edges of the cardboard. All in all, I had to abandon foamboard for my tiles, although I will be using it for smaller terrain pieces - and I still find it a good solution for something a home user could make.

I moved on to my final (so far) solution: the combination of solid foam sheets with a basing material underneath.

I wanted the foam part, since it will allow me to sculpt it into depressions, rivers etc. So I will be using polystyrene foam sheets, 1 cm thick, cut into 30x30 cm pieces. I tried both kinds of polystyrene foam available in the mass market, the expanded foam (called felizol in Greece) and the extruded foam (XPS, also known as DOW or styrofoam). Both have pros and cons, with the extruded sheets obviously more durable and rigid, but more expensive. Cutting them in shape is a wife's nightmare, but for mass production I would have to use a professional solution, involving heated blades or wire cutters. I will probably use both in Pedion, with expanded foam the most likely candidate due to cost (and it will be protected from its basing material anyway). Both solutions are extremely lightweight and quite economical.

My XPS (extruded polystyrene) foam tiles
As mentioned above, the foam tiles will be attached on some sort of base. Why the base?
First, from experts on the field, I have heard than even XPS, can wrap a little, or fray, however rigid and durable it may seem. A 2 mm rise on the corners could well spell disaster for my modular tiles - so better safe than sorry. Secondly, as I mentioned, I want to dig into the 1 cm thick foam, and still have a solid surface underneath, to act as, eg, the river bed. Thirdly, the base can be shaped to help with connectivity options.

Many materials could be used for a hard base under the foam sheet. Of those, I did not choose the most obvious and popular solution: wood, in the form of MDF. MDF sheets are a) too heavy b) too pricey, and c) still difficult too cut, compared with my other solutions. Do not get me wrong - MDF would have been my choice if I made Pedion just for myself . But in terms of mass production other materials are available: die-cut metal and plastic PVC sheets.

So far my tiles are produced with a basing of a thin sheet of aluminum (I tried steel - durable but heavy, you have no idea how heavy...). I chose aluminum 'cause it is a) Durable, b) Rigid, c) Light, d) Thin - I have used 1 mm (0.04") thick sheets, but will probably go for even thinner, at 0.5 mm (0.02"), d) Cheap, at these lightweight thicknesses. Obviously you do not cut it at home, but I have secured access to industrial die-cutters.


Expanded polystyrene Pedion tiles, with an aluminum base
Right now I'm experimenting on plastic (PVC foam) sheets - they seem equally lightweight and durable, not to mention low-cost.  Both solutions seem valid, and my final selection will come after some extensive cost-analysis.

Here is the form of the tiles so far - XPS foam sheet mounted on thin aluminum basing:

Notice those small, round thingies on the tile corners? these are small magnets, and if you like, I'll tell you below why I mounted them there...

Connectivity issues

Still reading? great - let me talk a bit about another requirement I have had. This is something that many manufacturers of modular terrain do not necessary tackle: keeping the tiles connected to each other. It is an issue for me and my Pedion tiles; you see, in many modular solutions the tiles are just too heavy to easily move around, or the manufacturer simply does not think this is an issue. However, Pedion tiles are lightweight to better carry them. And I wanted my tiles to keep together, even if somebody accidentally pushes one of them. On the same time I did not want a connectivity solution that would sacrifice Modularity and the ability to easily interchange and rotate terrain pieces on the table.

The first solution I came up with was to drill small wholes on specific distances from each tile corner. Each hole would be by the middle (thick wise) of the foam sheet, and there would be 8 holes total. Then each tile would slide to connect to the surrounding ones be using small, round pins - in my prototype I used common round toothpicks and they worked remarkably well. They maintain a strong grip among the tiles - so strong in fact, that you could lift 6 (2x3) interconnected tiles and they would keep together. One did not even have to join all the tiles, as you could just connect the framing tiles of your gaming area and they would keep the rest in place.

See the toothpick pins between the tiles?
It was (and is) a good, solid solution, and I would recommend it to anyone thinking about connecting foam tiles he/she has at home (post a comment below or join me in google+ if you need to know the details). However, the toothpick pins pose some minor disadvantages. It is not an easy solution to implement in mass production quantities of tiles. Also, it requires some extra effort when placing the tiles, in order to slide them carefully together, in a particular order, so that the pins enter correctly (not to mention some pricked fingertips). Then, the foam hole starts to get wider after a while, as the pins enter and exit repeatedly, enlarging it in the process. And finally, I had a small gameplay issue: when the tiles are fixed together, it is not easy to un-pin them and reconnect them, something that some games (like the Field of Glory Napoleonic ruleset) require for their terrain pieces (eg in FoG one player places and the other can rotate or move). All minor points, but I wanted something better for Pedion.

So I designed my current solution: magnet connectivity. Instead of small holes, strong magnets are mounted on each tile corner, eight magnets total. Their polarity is aligned so that they can easily snap together.  This solution works like a charm: the tiles snap and unsnap to each other without effort, and the tiles are truly interchangeable but still keep solidly connected.


In case you want to see how they connect for yourself, here is a short video:


By the way, this is not exactly an economical solution - magnets are cheap, but this is a LOT of magnets. If thing go well for Pedion, and we enter actual mass production, I have even better connectivity solutions in mind. But these require die-cutting of the base in a specific and complex way, that requires expensive matrices. Therefore, I will stick with my magnets for now.

If I managed to interest you so far, thank you. Trust me; the boring posts are over, and the next ones will more about the terrain itself. I NEED your comments and ideas, to improve Pedion even more, so do not be shy. And stay tuned!

Good gaming all

2015/01/14

Journal #1 - or, What I need from a modular terrain board?

So, this is my first post - my ramblings on creating a terrain board to play my wargames on, and my decisions that will shape (pardon the pun) the final form of the Pedion (tm) terrain tiles.

Please, whomever happens upon these lines, please bear with me: I am neither a native English speaker, nor have I written any kind of fan-blog entries before. And for any Greek speakers, please use the "translate" button on the right, hope it will help!

How it started? By giving into my desire to play as many wargames as possible. And I do not mean board wargammes, with chits, counters and hex boards, but the "paint-field-move-miniatures' army" kind. My friends will know I am an avid role player but I did not play wargames at home, and wanted to start doing so.

The painter-modeler in me wanted an appropriate battlefield to place my armies. I can live with playing with book stacks, boxes and rubbers, it is perfectly fine - it just ruins the experience for me, as it does for many people I guess.

Another common problem is that I do have a table, which is large and sturdy enough. However, living in a flat, that means the table rests in the living room (or the kitchen or someplace equally non-game friendly) and not in a play-room or garage. Therefore, I could not create a magnificent one- or two-piece terrain board, and put it there permanently (or even semi-permanently) without disrupting my domestic life (read: my wife would crucify me).
Actually, space is a commodity that I find exceptionally dear in a flat, as do many of you: terrain boards and big feature pieces, while so cool looking, need some place to store. And they take a LOT of room, usually far away from where you need them most; that is, the living room table (again, storing them next to china and crystals proves ...unhealthy).

Why the long intro? So you can understand what led me to stating the requirements further below. Keep in mind - I would kill to have some of those incredibly looking, large an heavy terrain boards/tables where I could easily game in no time. But having only a living room table and limited storage space, I have to find something that suits me.

Being not the first into such dire straights, there are a number of solutions for gamers like me. They can be generalized into three broad categories:

  1. the flat, printed board; either on plain plotter paper, cardboard or vinyl you may now print battlefield 2D pictures with reasonable cost, even for large sizes like 6'x4' tables. Or the flat surface can well be a tablecloth (usually green) or a large static grass mat. These are great solutions and I have used them many times (and will again). They are especially useful in RPGs or skirmish wargames, they make no mess, they can include a square or hex pattern, and you can roll them and store them away. Of course the rolls are big and take some space. But my main problems with printed surfaces are a) they are flat, and b) they are fixed.
  2. adding terrain pieces on a flat board; I guess this is the most common solution - God knows, it is the one I have used so far. It usually is an expansion of the previous solution: get flat green/printed board and add roads, rivers, hills, buildings etc. Its fast, does the job, looks good, and has actual game value: you can create different terrain configurations, depending on the scenario played or even random terrain placement rules. But it does not "look" that realistic. I am not only a modeler by hobby, but an surveying engineer/cartographer by profession. They are not pleasing to my eye and do not reinforce my will to wage battle on them. I am especially sensitive towards the ground features -not the man-made ones, like buildings. I would like hills and roads to look a part of the surrounding terrain, not like afterthoughts. And especially, I cannot stomach rivers, creeks, craters and chasms that actually rise OVER the surrounding ground (ok, only for WWII gaming in the Netherlands) 
  3. modular terrain boards; this is the most complicated and more expensive -but also most realistic- solution sort of a fully build terrain tabletop. And they come in all sort and sizes. Here is where Pedion come in. You see, I started searching for commercial solutions in terrain tiles, and while many, none fulfilled me completely. While there are many solutions for dungeon-building, the wargame terrains where quite expensive, big in size, did not allow much variation and came mostly unpainted - and they were expensive, did I say that? One of my favorites -which I almost ordered- is the HEXON II modular terrain; they are modular, lightweight, easily stored, allowing for an extreme variety of battlefields. However, even with them I would have to spend around €200 (that is ~$250) to fill a 6'x4' area of flat green flocked tiles, without any other features... ouch
After examining (and applying) the solutions above, I came to some basic requirements for my wargaming terrain (finally mate, took you long enough). These are:

  • Modularity - again, I would love to have a large, uninterrupted gaming board lying around, but I cannot. So I need my terrain to consist from multiple pieces (tiles) that I can pull out of storage and fit together to create the second best thing: a good looking terrain, even if some seams are showing. However, being modular does not mean that it would not offer some advantages: modular tiles should be used to create multiple layouts of the terrain, conforming to different scenarios - something that a fixed (or printed) board cannot do, however beautiful. Many make "modular" boards which are actually larger boards simply cut into pieces. They can be stored away, but always fit the same way (or with slight variations). I want my tiles to support different layouts - check out the great design process from Clarence Harrison over Quindia. Taking this a step further, I would also like my tiles interchangeable, e.g. I could remove some "broken ground" tiles and add some "forest" tiles in their place (kind like HEXON allows).
  • Efficient storage - storage space is an issue for me, and I guess for others. Terrain pieces tend to take space. Lot's of it. While this is something you cannot avoid with pieces like houses, trees etc (or can you? I'll let you know in a later post...) perhaps something can be done with the terrain board. Large pieces of board are simply to difficult to store. Rolled prints or mats can fit vertically behind doors or tall closets, but they can fold - and they are too 2D for me. So if I go with modular tiles, I would like them in a size that can be easily stored away. Large tiles take less time to fit into a board but take more space afterwards. Small tiles take more time to layout but be put into a box, on a self (this is something that Hexon does really good, I told you I liked them). What I would like would be tiles which they strike a "golden" medium between size and storage space. Something to fit on a regular 30-40cm (~1 foot) self and stack over another, allowing my to close the cabinet door and keep them out of sight. Stacking is also important: tiles cannot be too high/deep. Stacking 15 or 20 3-5 cm (2") thick tiles one over another can create  a largeee stack that will not fit easily everywhere. I would like my normal (flat, not hilly) tile to rise around 1 or 2 cm (0.4-0.8").
  • Lightweight - since I am tending towards a modular system, I will need to move it around. And not only from and towards my table, but to carry it to friends' houses, my game store, conventions, even ship it. Thus I need my tiles to be made from lightweight materials. This is one of the main reasons I would try to avoid eg mdf basing - it's great, but adds a lot of weight, even if the wood is thin. 
  • Economy- by this I mean affordable, not cheap. When people and companies charge these sums for their modular tiles, they are not out to make millionaires of themselves (I think). But molds are expensive, and this is the cost you have to pay for a quality product. However, I do believe that there exist materials and techniques that cost less (especially if you are doing it yourself). Perhaps there will be some loss on quality, but the result will not necessarily suffer so much as to be unusable in everyday wargaming. To be more specific, I do not think one can get a good-looking 3D terrain board for a 6x4 table with only $30, but I do not want to spend $250 for an unpainted board either. I would consider something in the price range of $80-120 a decent and honest trade for 4x4 or 4x6 terrain (even if I still lacked the funds to buy it). 
  • Durability - as theTerrainTutor aptly calls it, the tiles must be "wargaming resistant". Normal usage and storage should not see them bend, flayed, shrank etc... Not that there will be no wear, especially as long as the production cost goes down....
  • Appearance - yes, I would like my tiles to look good, and even come pre-painted and pre-flocked! I know, I could do it myself. However, if I am going to pay over 200 euros, at least the terrain can come ready-to-play. I do not necessarily mean professional looking, drooling over terrain (oh  - my  - GOD!). Realistic 3D terrain that creates the illusion of a real landscape will suffice to let my imagination roar (along with my Dwarves)
  • Level Surface - perhaps this sounds at odds with my wish for a 3D terrain board. I mean, if I want flat, I could just roll a grass terrain mat already! What I actually mean is that the terrain should be made for wargames, not for a modeling/railway diorama. I want realistic looking ground, but on the same time I have to move my miniatures along and roll dice. So the tiles should try and strike a fine balance between the illusion of a 3D environment and large flat (or gently sloped) surfaces where the minis do not fall off or get stuck when moving. This annoys the surveyor in me, but I HATE it when the minis do not stand upright...
  • Seamless - I understand you cannot escape the joints showing on a modular board. And the smaller the tile size, the larger the number of seams among them. However, I would like the tiles to fit closely, and perhaps a solution to cover the gaps from showing to much. Deep and/or wide seams can even affect gameplay, movement of trays, and dice rolling (dice may fall into the small gap, listing on one side). 
  • Connectivity - I would like my tiles to keep together and not move/slide on the tabletop. So something must keep them together. This can be done either by tile shape (an advantage of hex based tiles) or heavier basing - but the latter contradicts to my lightweight requirement above. Plastic tiles sometimes have a connecting system like some sort of clips. The minimum requirement would be a way to stop the tiles from moving horizontally. Now, if it could also allow for raising a bit of the board without some tiles falling off, all the better....
Wow, did you read this far? thank you! I will not rumble anymore, since I will elaborate on how Pedion will tackle these requirements in future blogs. I would welcome your ideas, additions and comments on the points I make, but hold your horses a bit on proposing solutions - these I will discuss in more detail another time. 

As a final note, I give you some images of my first efforts creating a modular tile system that tries to fill the Requirements I mentioned. In some areas it succeeds, in others it fails. What you see is a 4'x4' (approx.) game terrain consisting of road, plain and difficult ground tiles. It is extremely lightweight, easily stored, adequate on appearance, and can be laid out in a myriad of ways. However it lacks on durability and stability. I have moved on from these materials, but tell me what you think. Oh, and the building are just for show - cardboard printouts of the fabulous Dragon Games series. 


Good gaming all!